 Ankit Gandhi
Reflex VR
A web-based VR reflex game for Meta Quest 3, designed around reach, comfort and clear feedback.
Built for a technical test.
Overview
Reflex VR is a web-based VR game inspired by a physical reflex wall: buttons that light up, a timer and a score. I reimagined the wall as a comfortable, room-scale experience for Meta Quest 3, built around reachable targets, quick punches and clear feedback.
I didn’t copy the wall. A real wall asks you to reach across a large surface and press buttons. In VR that would tire your arms and make depth hard to judge, so I redesigned the game around what works in a headset: targets within reach, a punch instead of a press, and feedback that makes up for having nothing to touch.
The design question
How do you keep a fast game readable, comfortable and fair for someone in VR, possibly for the first time? Every decision below is an answer to that question.
What the game looks like
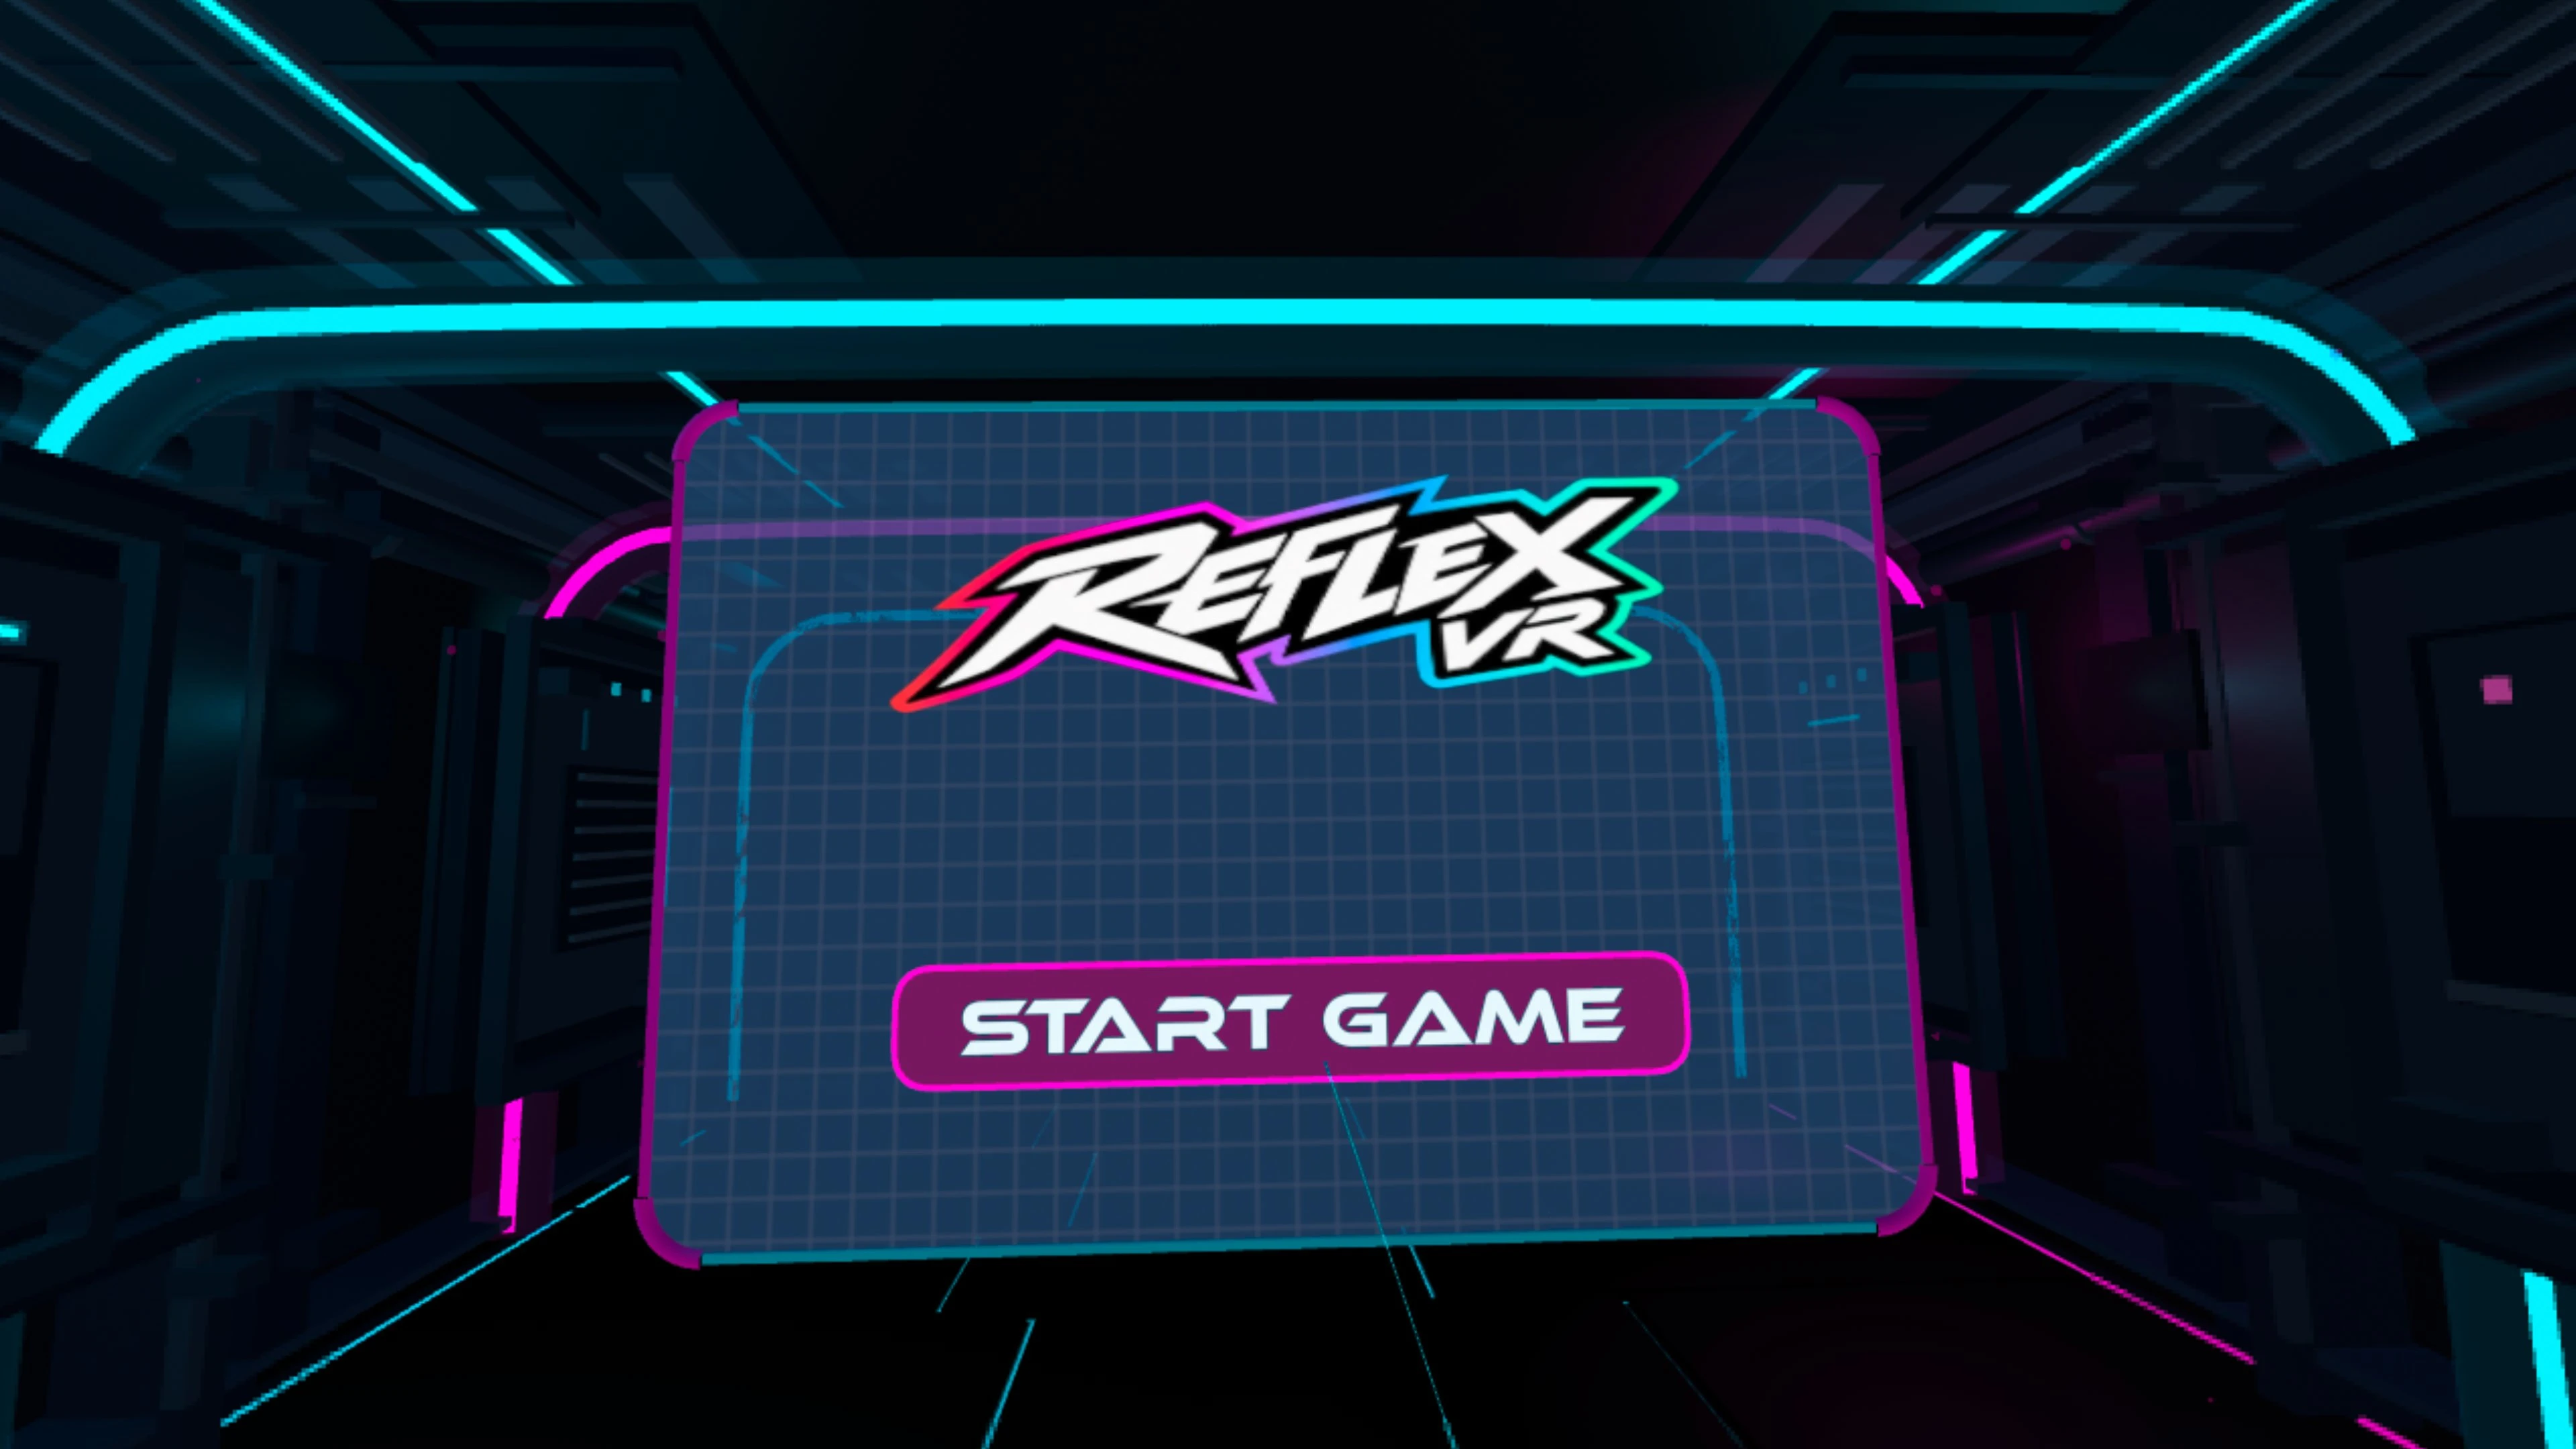
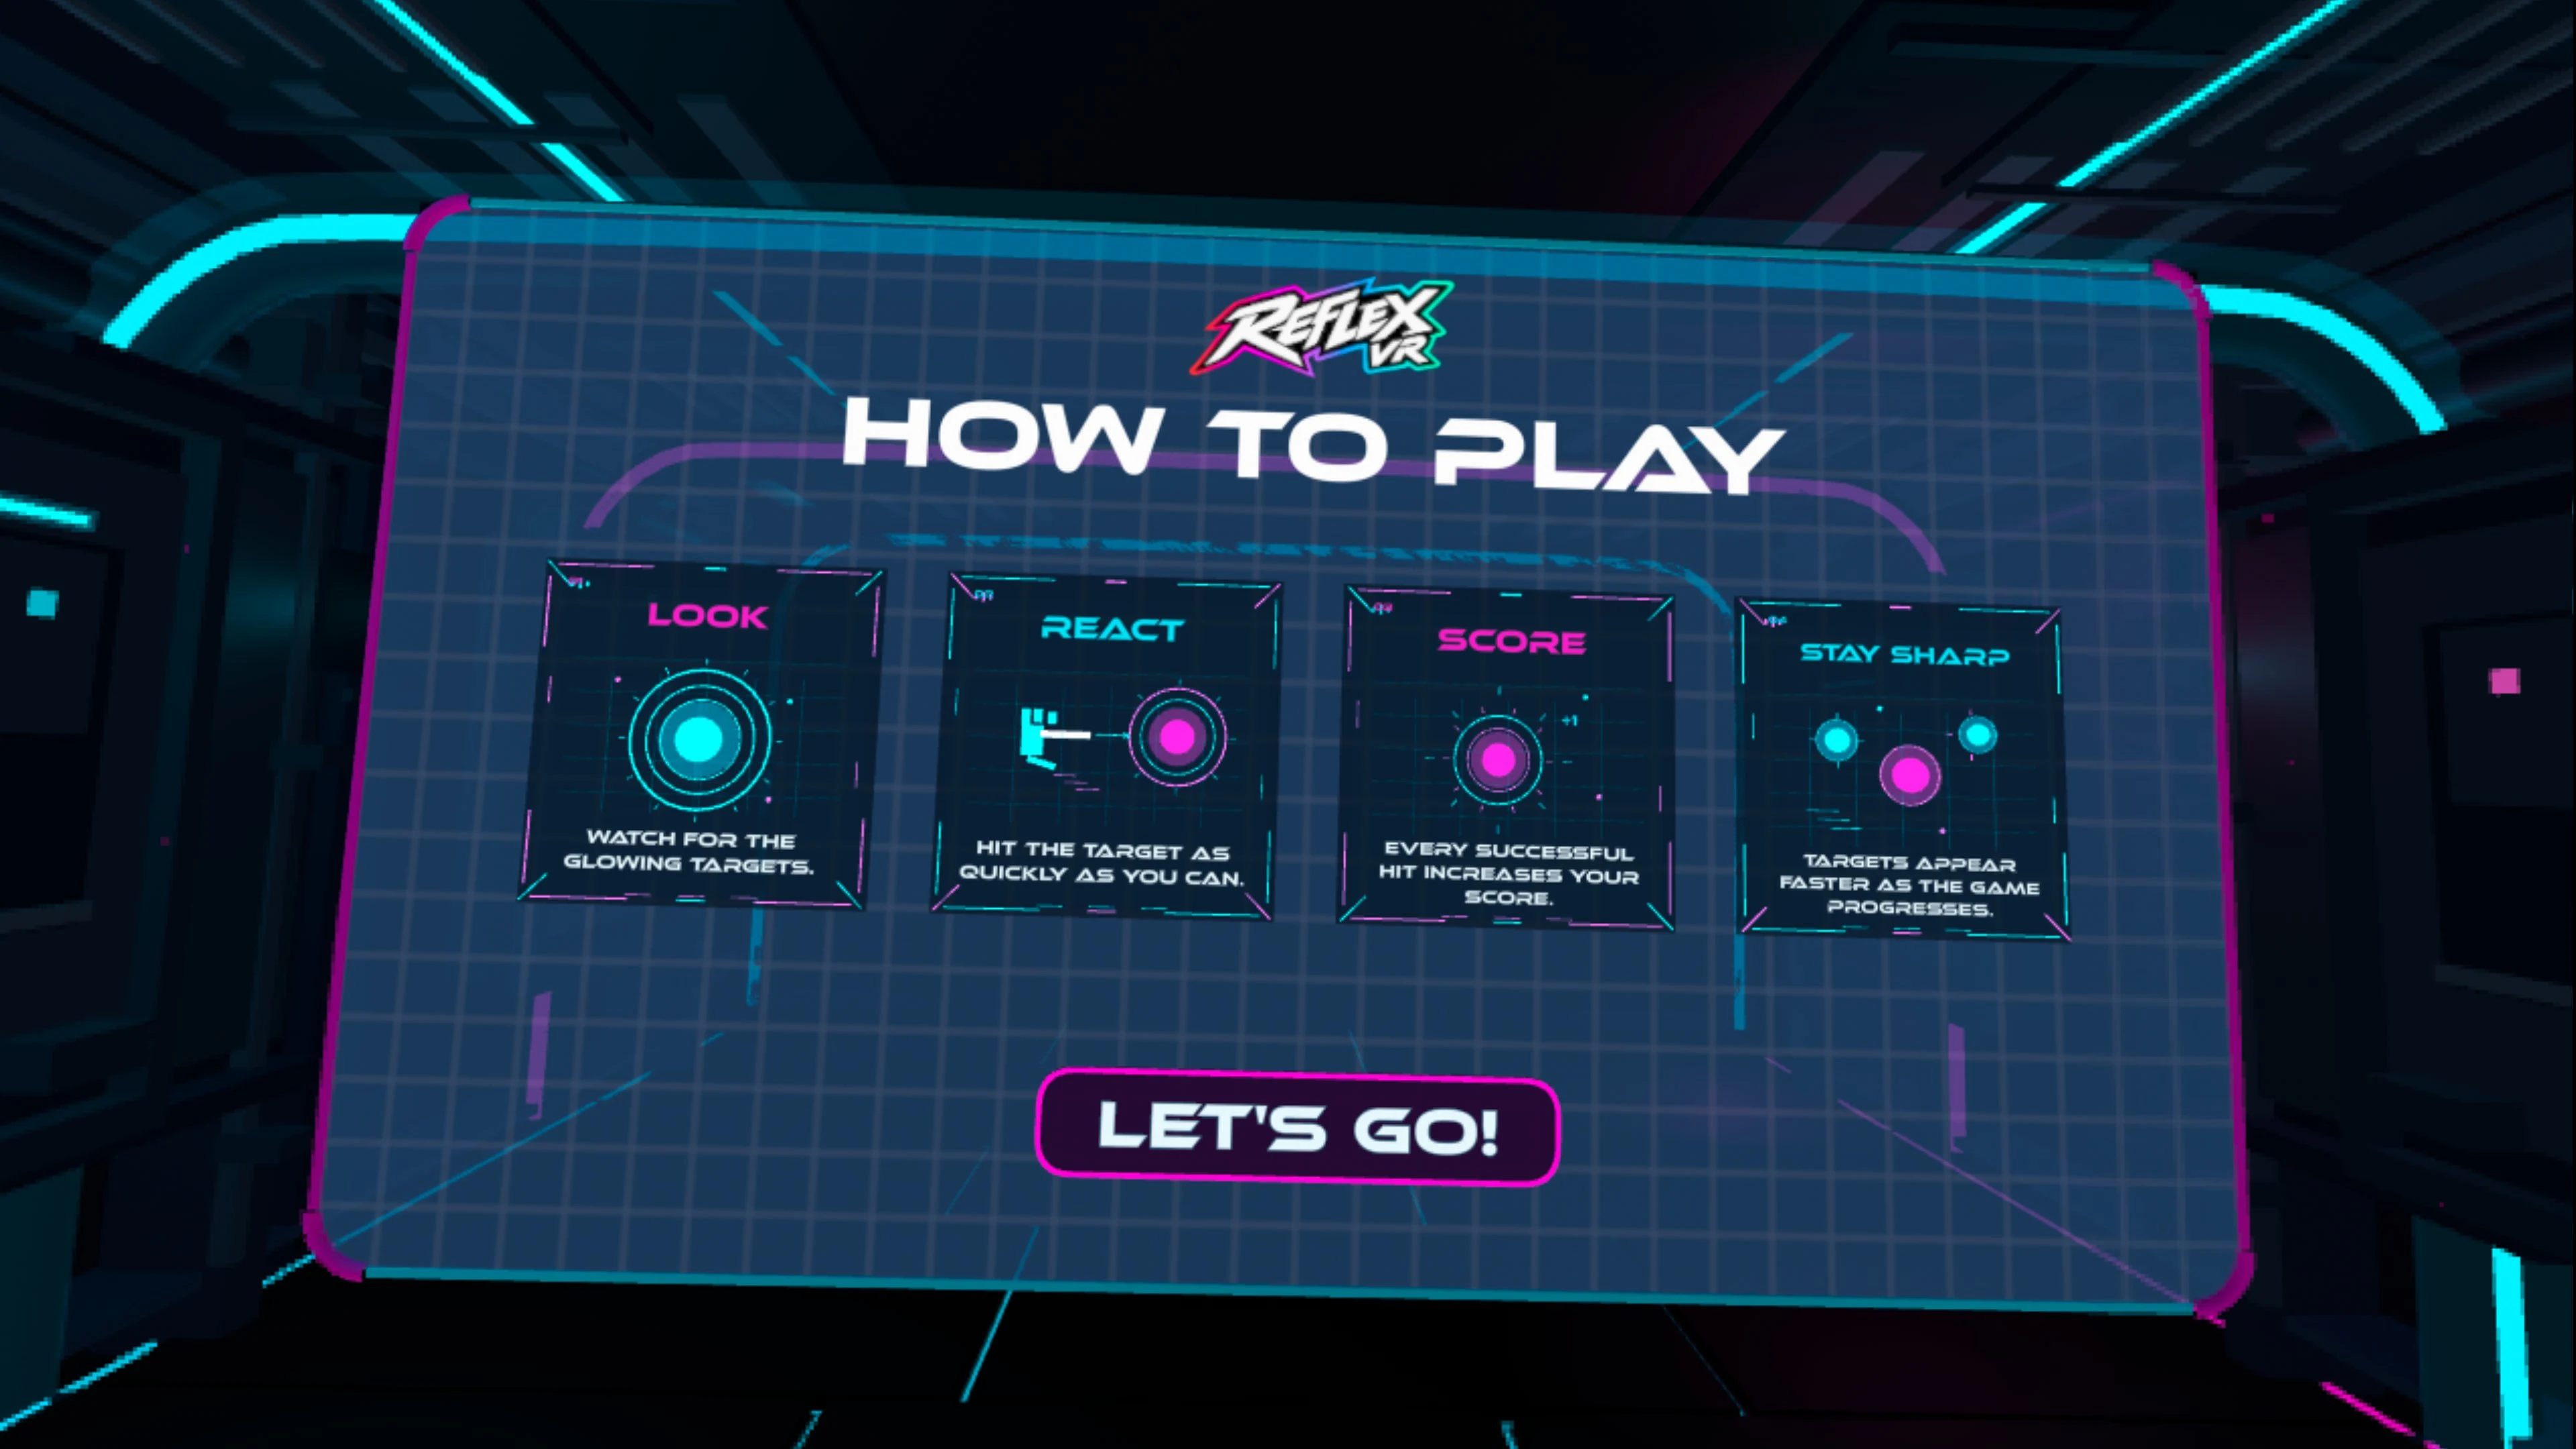
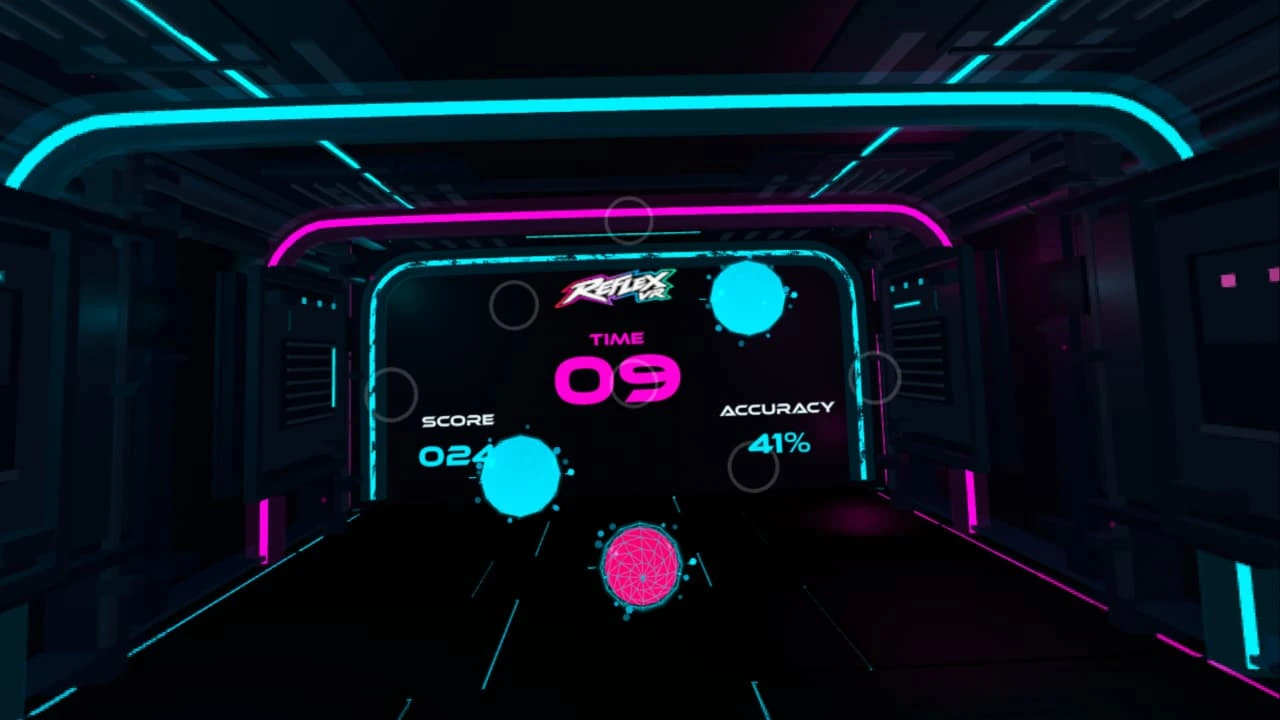
The game moves through four states: welcome, countdown, playing and game over. On the welcome screen a how-to-play panel explains the controls, and the player starts the game with a button, selected with a laser pointer. A short countdown gives them a moment to get ready.
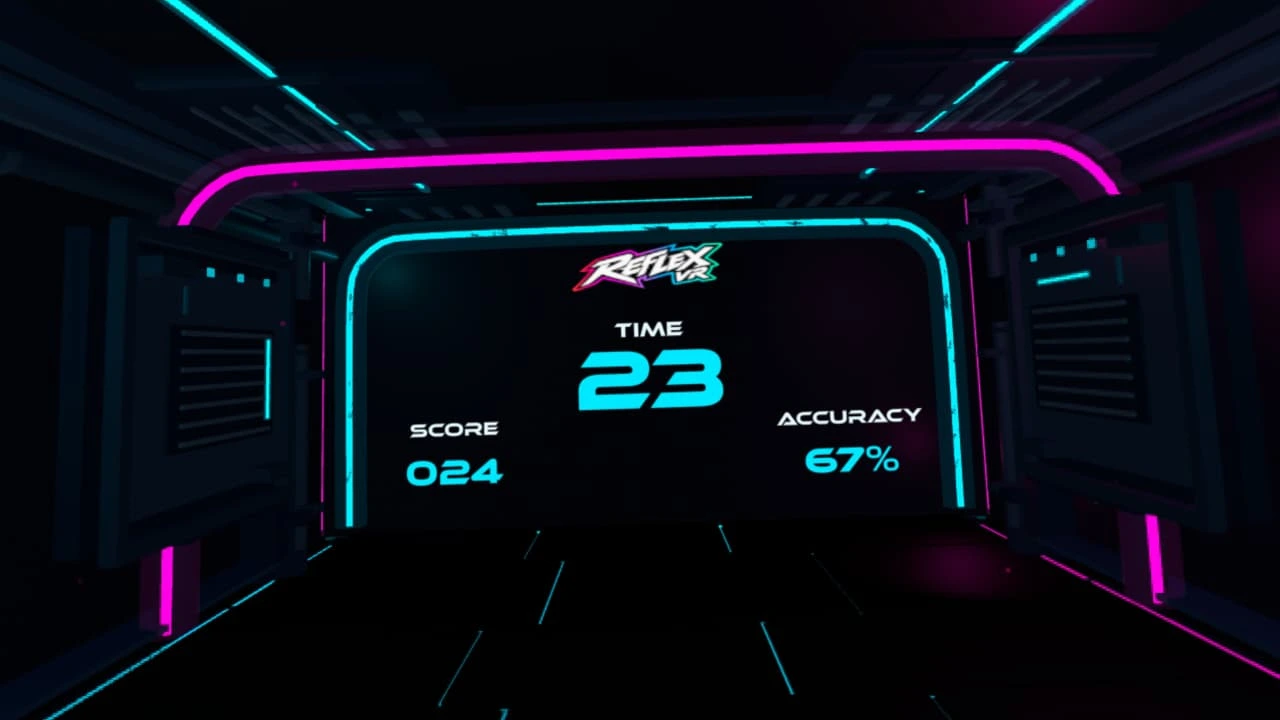
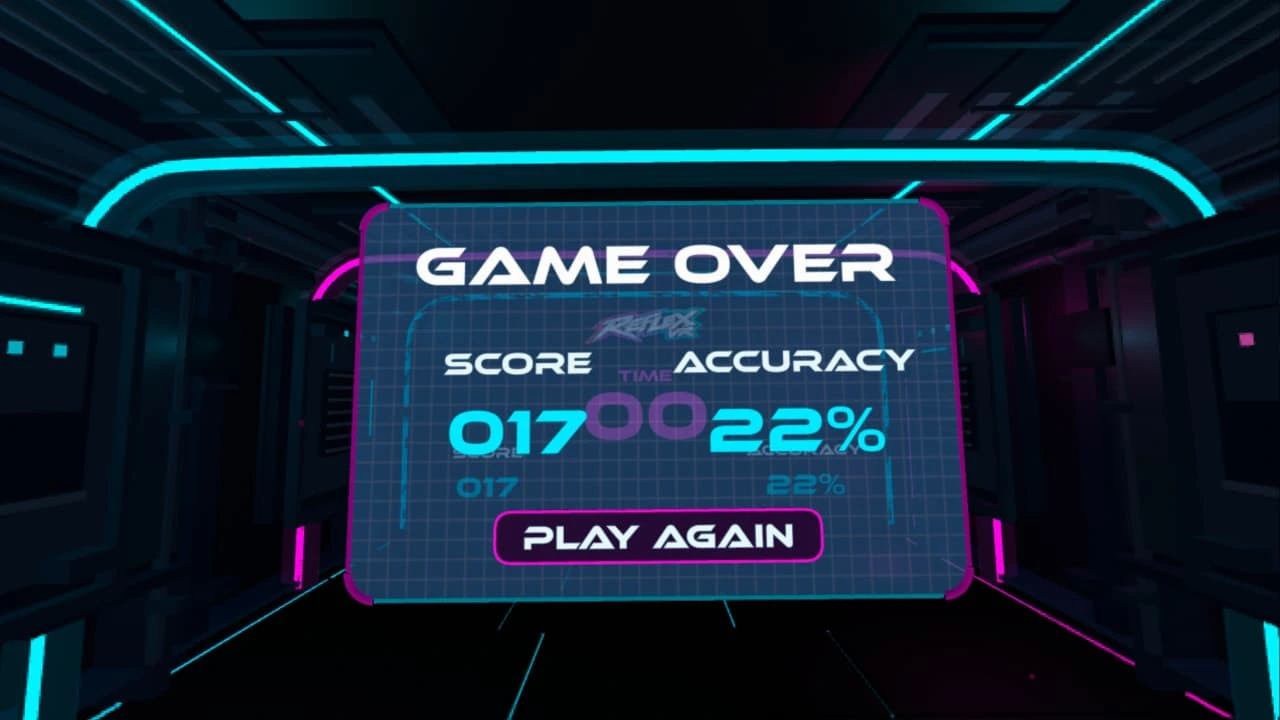
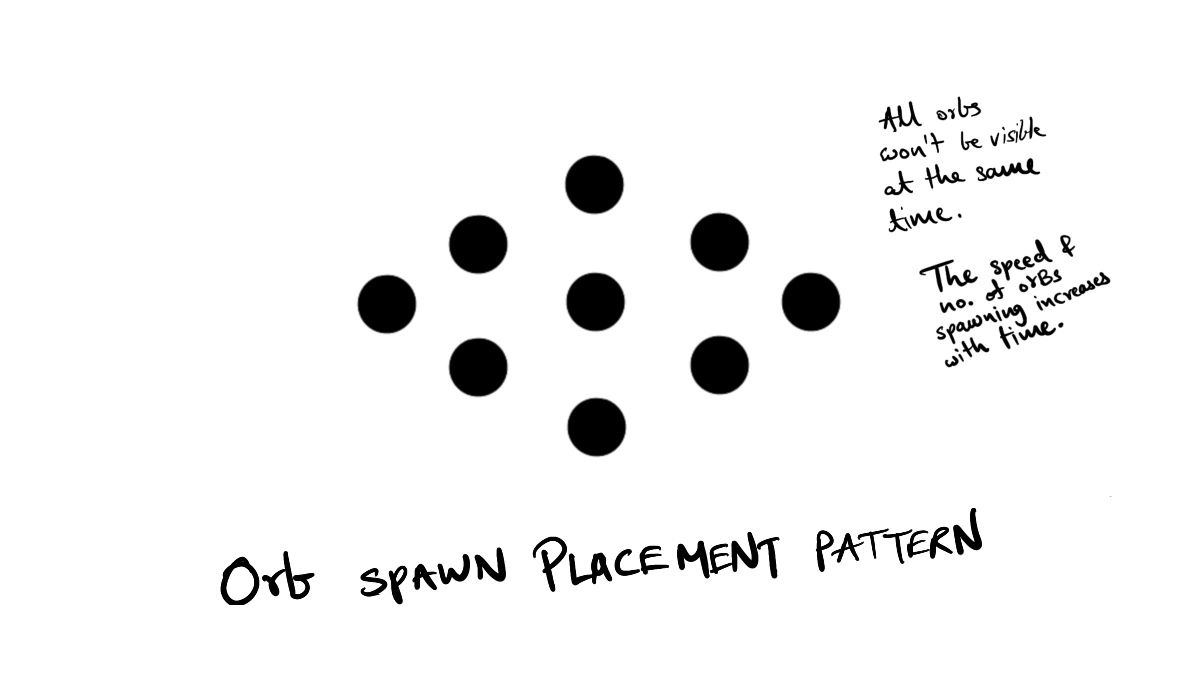
Then the 60 seconds begin. Orbs appear on a diamond of nine positions in front of the player, who punches them. The wall behind shows the time and the score. When the timer ends, a game-over screen shows the final score and accuracy, with an option to play again.
The difficulty curve
Difficulty builds in six steps over the 60 seconds.
- 0 to 10 seconds: one orb.
- 10 to 20 seconds: two orbs.
- 20 to 30 seconds: three orbs.
- 30 to 40 seconds: three orbs, each lasting two seconds.
- 40 to 50 seconds: four orbs.
- 50 to 60 seconds: four orbs, with instant respawn.
Spawn times are randomised and staggered, so the rhythm feels organic and cannot be memorised. Never more than four orbs are on screen at once.
Design decisions and considerations
These are the choices that shaped the game, with the reasoning behind each one and what it costs.
- Bring the targets to the player
The orbs float about 1.3 metres in front of the player, close enough to reach with a punch, and the big wall stays as a distant backdrop. Reaching far or stepping forward tires players quickly and is hard to judge in VR, so the game never asks for either. Trade-off: a smaller, less physical play area than the real wall.
- Punch instead of press
An orb counts as hit when a controller gets close to it, so the player throws a natural punch and does not need to aim a ray or press a button. Each orb registers only one hit, so a swing that passes through it cannot score twice. Trade-off: proximity can pick up accidental touches, so the size of the hit zone matters.
- Nine slots, never all at once
The targets appear in a diamond of nine positions, and only a few are active at a time. A small, readable pattern keeps every target inside a comfortable view, so the player does not have to turn their head, and it limits how much they have to track at once. Trade-off: fewer targets can feel sparse, which the difficulty curve makes up for.
- Change one thing at a time
Difficulty rises in six steps that mix more orbs, shorter lifetimes and faster respawns. Because each step changes one thing, players can feel the change, and the first ten seconds stay gentle for newcomers. Trade-off: the curve is fixed and does not adapt to skill.
- Show only time and score
I dropped accuracy tracking. In a punching game a miss is a swing at nothing, and counting it adds a number the player cannot act on while moving. Two numbers can be read at a glance. Trade-off: skilled players get less detail about how they played.
- Put the HUD in the room, not on the player’s face
Time and score sit on the wall in front of the player instead of being locked to the headset, where they can crowd the view and feel uncomfortable. The particles that drift through the room thin out near the HUD, so the numbers stay readable. Trade-off: the player has to glance at the wall to read them.
- Make every hit answer back
With nothing to feel, a hit has to be unmistakable. The orb swells and fades, and a sound plays, both at the same moment and both short, so they confirm the hit without hiding the next target. Trade-off: effects add visual and sound noise, so they stay brief.
- Teach first, then start the clock
A how-to-play panel, a start button and a countdown come before the 60 seconds begin, so a first-time VR player knows what to do. Menus use laser pointers, which most VR players already expect. Trade-off: a few more seconds before play starts.
- Protect the frame rate
Orbs share one geometry and material instead of creating new ones each time, and the hit animation works on that shared mesh. A steady frame rate matters in VR, because dropped frames can cause discomfort. Trade-off: the code is more complex than creating a new object for every orb.
The environment
The room sets the mood without competing with the targets. Neon strips run along the walls and ceiling, a cyan grid covers the floor, and floating particles drift toward the player, fading in and out as they move. They thin out near the HUD so the numbers stay clear.
How I built it
The game is a set of small A-Frame components, each doing one job: one detects punches, one spawns and removes targets, one runs the timer, one keeps the score, one switches between game states, and others draw the grid floor and the particles.
I’m not a developer and had not used A-Frame before, so I built it in small steps with Claude as a mentor. It explained what each step did and why, and I wrote the code, tested it in the browser and fixed what broke. I followed a roadmap of about twenty steps: the scene and VR entry, the player position, a single orb, punching, the hit state, the timer, the score, spawning, difficulty, game states, the HUD, feedback, the environment, optimisation and deployment.
Three problems taught me the most:
- An orb could register a hit more than once. I gave each orb a one-time hit state.
- The hit animation never played, because the spawner removed the orb first. I changed the order so the animation finishes before the orb is removed.
- Creating a new object for every orb was too heavy. I switched to shared geometry and materials.
Testing
I tested the game in the browser with a WebXR emulator while building.
Outcome and what I learned
Outcome. Reflex VR became a playable browser-based VR experience for Meta Quest 3.
What I learned
- In VR, ask players to read, remember and aim at as little as possible.
- Feedback has to do the job of touch.
- Small steps beat big plans. Testing each step made bugs easy to find.
What I would do next. Test with more players, including first-time VR users, tune the hit zone and the pacing from what I see, and try a difficulty curve that adapts to skill.